


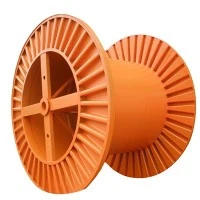


A punching bobbin is a crucial component in various industrial and manufacturing processes, especially those involving wire punching and coiling. Over time, due to continuous use, wear and tear, or unforeseen accidents, a punching bobbin can get damaged. When this happens, it's essential to replace it promptly to ensure the smooth operation of your machinery. As a trusted punching bobbin supplier, I'm here to guide you through the process of replacing a damaged punching bobbin.
Step 1: Identify the Problem
The first step in replacing a damaged punching bobbin is to accurately identify the problem. Inspect the bobbin carefully to determine the extent of the damage. Common signs of a damaged punching bobbin include cracks, breaks, excessive wear on the surface, or misalignment. If the bobbin is cracked or broken, it will need to be replaced immediately as it can no longer function properly and may cause further damage to the machine. Excessive wear can lead to inconsistent wire feeding, which can affect the quality of your products. Misalignment can cause the wire to tangle or break, leading to production delays.
Step 2: Select the Right Replacement Bobbin
Once you've identified the problem, the next step is to select the right replacement bobbin. This is where our expertise as a punching bobbin supplier comes in handy. We offer a wide range of high - quality punching bobbins, including Professional Grade Copper Wire Bobbins, Punching Wire Spool Bobbin, and Steel Wire Coil Punching Bobbin.
When choosing a replacement bobbin, consider the following factors:
- Material: The material of the bobbin should be compatible with the type of wire you are using. For example, copper wire bobbins are suitable for applications where conductivity is important, while steel wire bobbins are more durable and can withstand higher tension.
- Size and Dimensions: Ensure that the replacement bobbin has the same size and dimensions as the original one. This includes the diameter, width, and the hole size in the center. A bobbin that is too large or too small may not fit properly in your machine and can cause operational issues.
- Capacity: The capacity of the bobbin refers to the amount of wire it can hold. Choose a bobbin with a capacity that meets your production requirements. If you have high - volume production, you may need a bobbin with a larger capacity.
Step 3: Prepare the Machine
Before replacing the damaged punching bobbin, you need to prepare the machine. First, turn off the power supply to the machine to avoid any electrical hazards. Then, remove any remaining wire from the damaged bobbin. This can be done by carefully unwinding the wire or using appropriate tools to cut it. Make sure to keep the wire organized to prevent tangling.
Next, clean the area where the bobbin is installed. Use a clean cloth or a brush to remove any dust, debris, or metal shavings. This will ensure that the new bobbin fits properly and operates smoothly.
Step 4: Remove the Damaged Bobbin
Once the machine is prepared, it's time to remove the damaged bobbin. Most punching bobbins are secured in place using a locking mechanism, such as a screw, a clamp, or a pin. Use the appropriate tools to loosen and remove the locking mechanism. Gently lift the damaged bobbin out of its position. Be careful not to damage any other parts of the machine during this process.
Step 5: Install the New Bobbin
Take the new punching bobbin and carefully place it in the same position where the damaged bobbin was removed. Make sure that it is properly aligned and seated correctly. Then, use the locking mechanism to secure the new bobbin in place. Tighten the screw, clamp, or pin firmly, but be careful not to overtighten as this can damage the bobbin or the machine.
Step 6: Thread the Wire
After installing the new bobbin, it's time to thread the wire. Start by feeding the end of the wire through the appropriate guides and pulleys in the machine. Follow the wire path as indicated in the machine's manual. Make sure the wire is properly tensioned and runs smoothly through the guides. If the wire is not threaded correctly, it can cause problems such as wire breakage, inconsistent feeding, or poor product quality.
Step 7: Test the Machine
Once the wire is threaded, it's time to test the machine. Turn on the power supply and start the machine at a low speed. Observe the operation of the machine carefully. Check if the wire is feeding smoothly, if there are any unusual noises or vibrations, and if the quality of the punched products is satisfactory. If you notice any problems, stop the machine immediately and make the necessary adjustments.


Step 8: Monitor the Operation
After the initial test, continue to monitor the operation of the machine for a while. This will help you ensure that the new punching bobbin is working properly and that there are no underlying issues. Pay attention to the wire tension, the speed of the machine, and the quality of the products. If you notice any changes or problems, address them promptly.
Conclusion
Replacing a damaged punching bobbin is a relatively straightforward process if you follow the right steps. As a punching bobbin supplier, we are committed to providing you with high - quality products and the support you need to keep your machines running smoothly. If you have any questions or need assistance in selecting the right punching bobbin for your application, don't hesitate to contact us. We are here to help you with your procurement needs and ensure that you get the best value for your money. Whether you are a small - scale manufacturer or a large - scale industrial enterprise, we can provide you with the right solutions for your punching bobbin requirements. Contact us today to start the procurement process and take your production to the next level.
References
- Industrial Machinery Maintenance Handbook
- Wire Processing and Coiling Manuals